Step 1 of 5

Bloom Hair Studio · 12 Rose Street, Leeds
Book with Bloom Hair Studio
Pick a service and a time. You pay online to confirm.
What would you like to book?
Cuts
Colour
Powered by app2email
Integration: Book-and-Pay
Let your customer book and pay for appointments all in WhatsApp. The booking goes straight into your calendar, the payment straight into your account, and a reminder goes out before the visit.
1 minute 26 seconds, with subtitles.
Every screen below is what a customer sees with the standard booking form. Under each one: what you can set to make it your own.
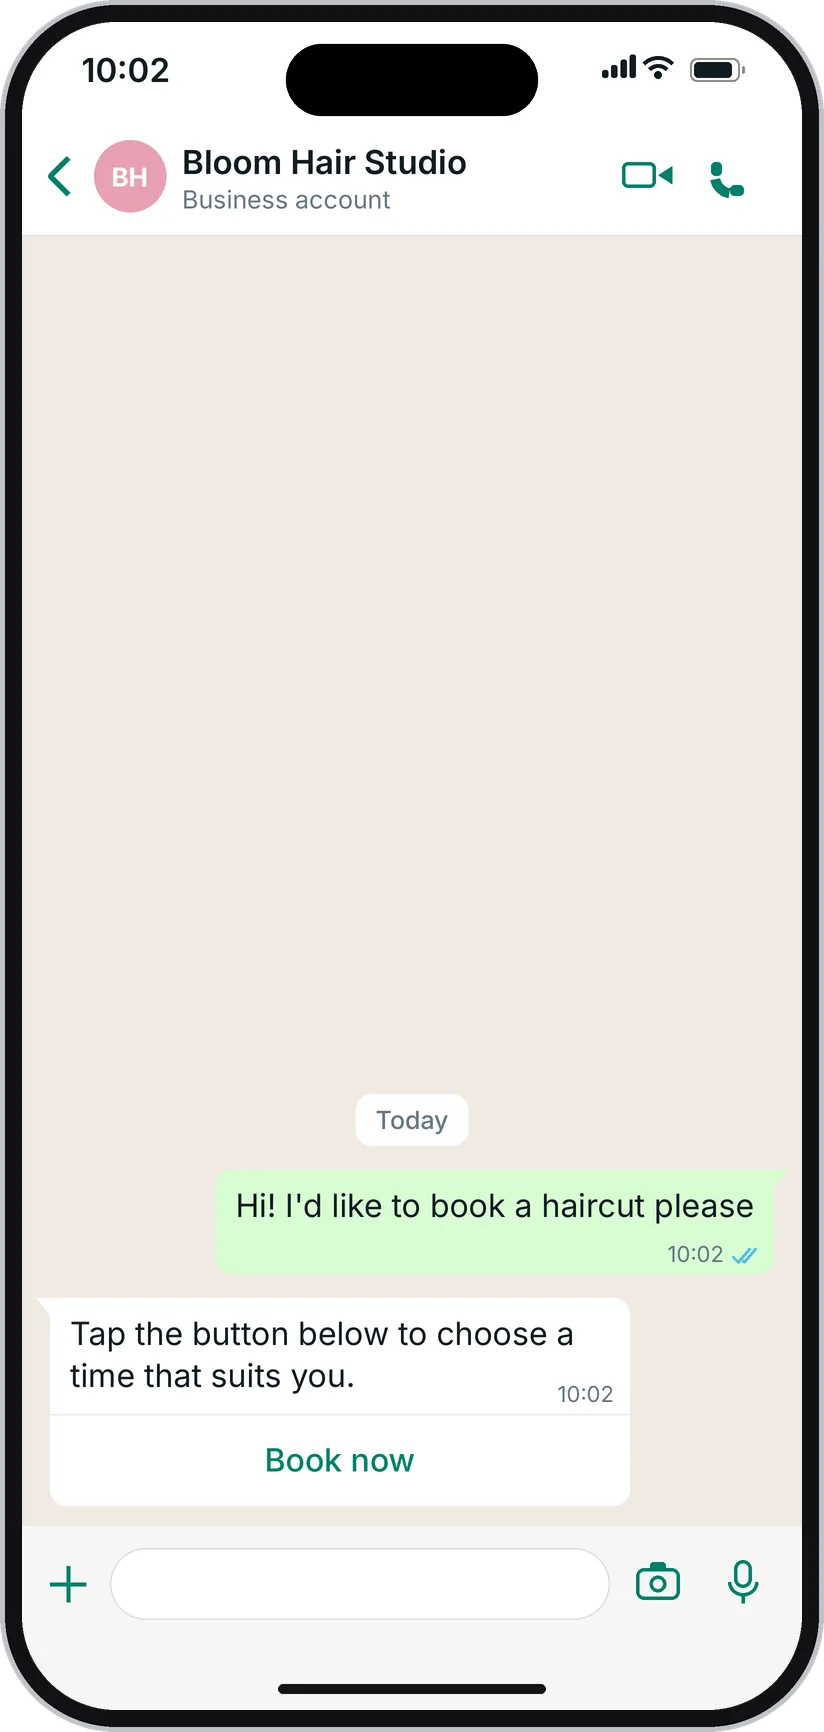
Step 1 of 12
The customer writes something like "I'd like to book" to your WhatsApp number. An automatic reply arrives straight away with a Book now button. Nothing to download, no website, no sign-up.
You set
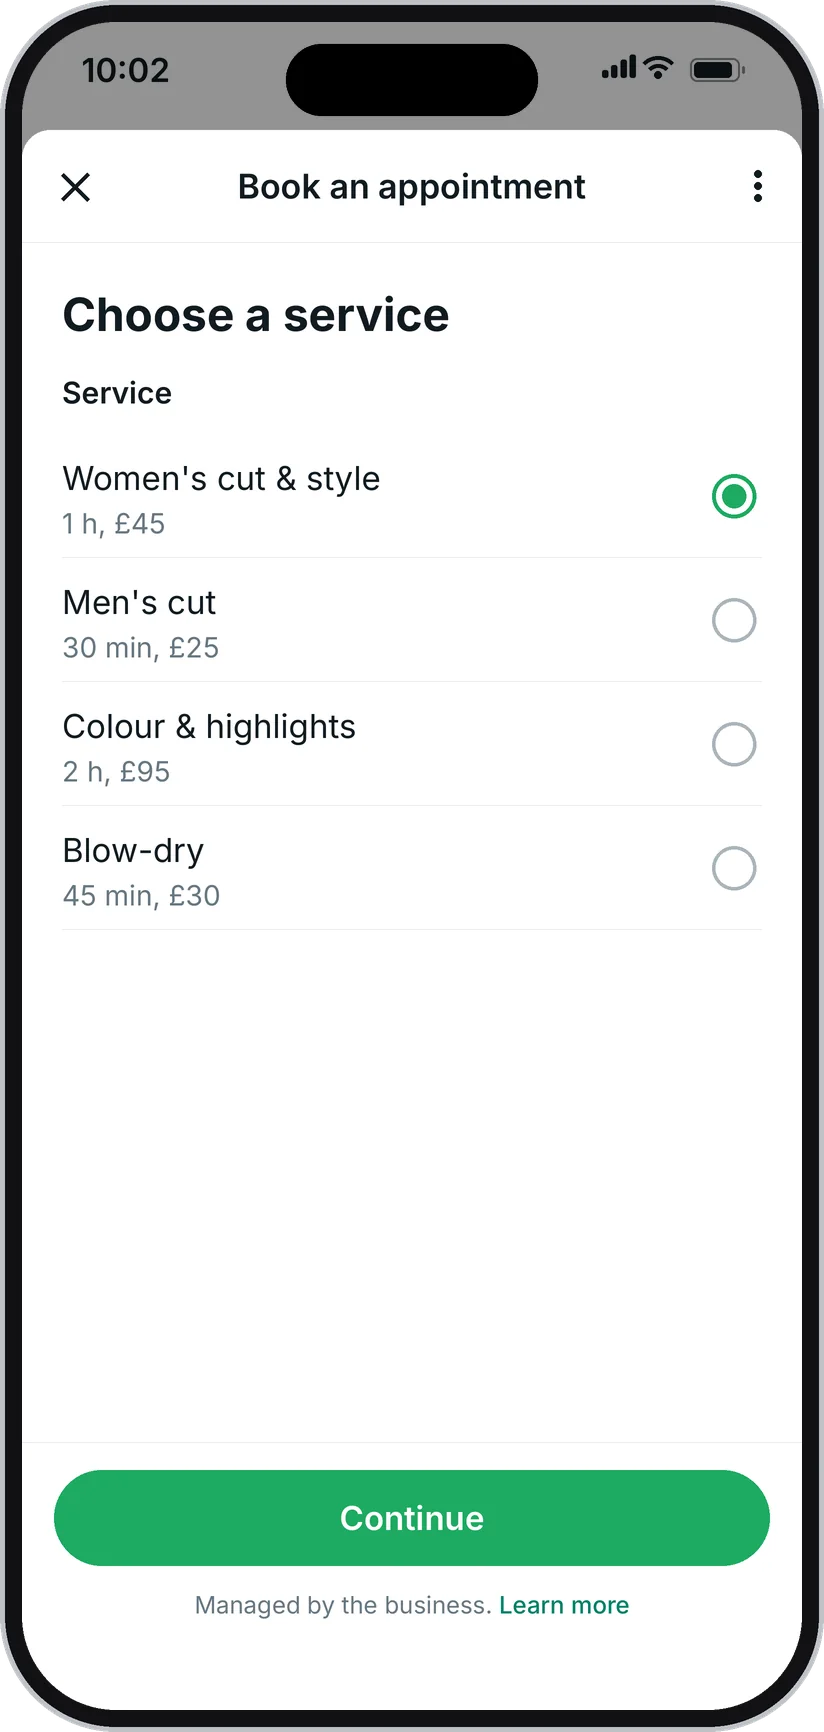
Step 2 of 12
A booking form opens inside WhatsApp. Each service shows how long it takes and what it costs.
You set
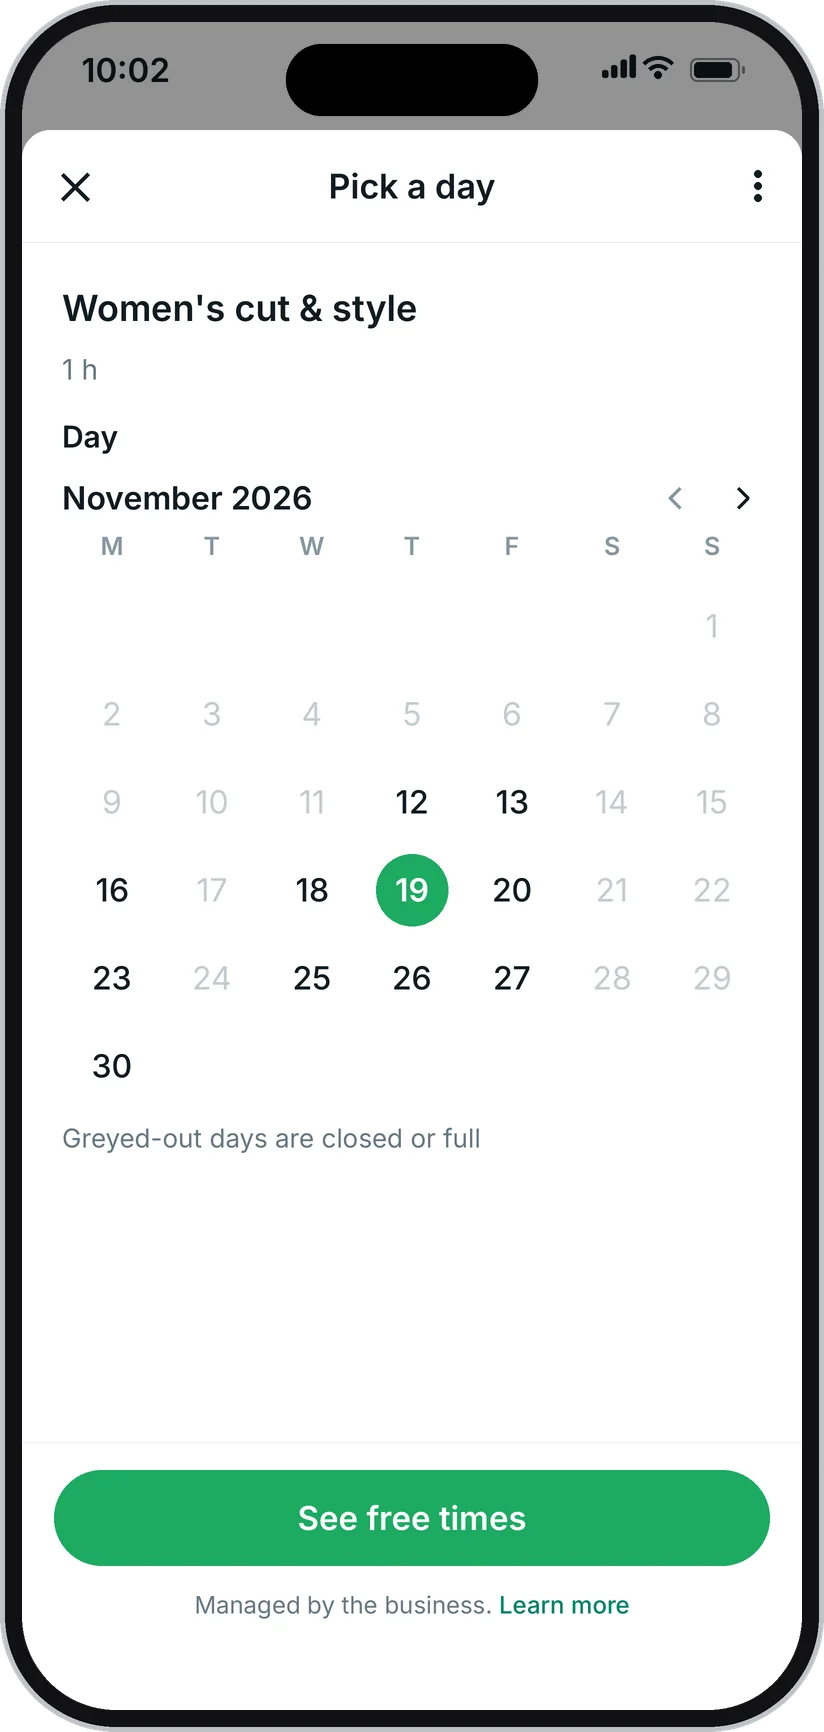
Step 3 of 12
Only days with a free time can be picked. Closed days and fully booked days are greyed out.
You set
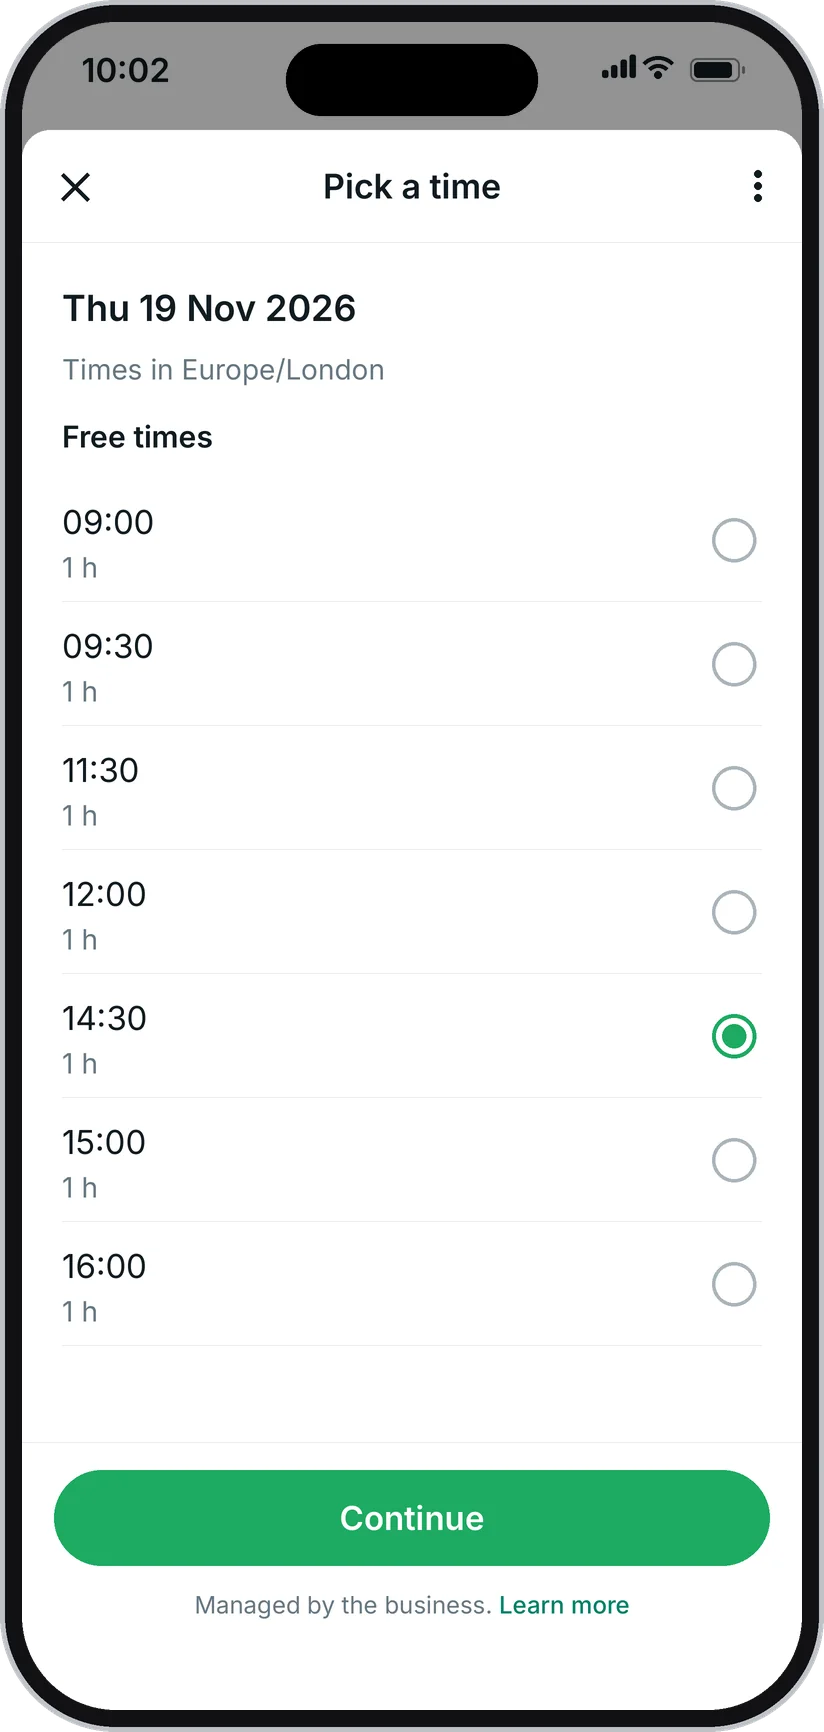
Step 4 of 12
The free times come live from your calendar, so the same time can never be booked twice.
You set
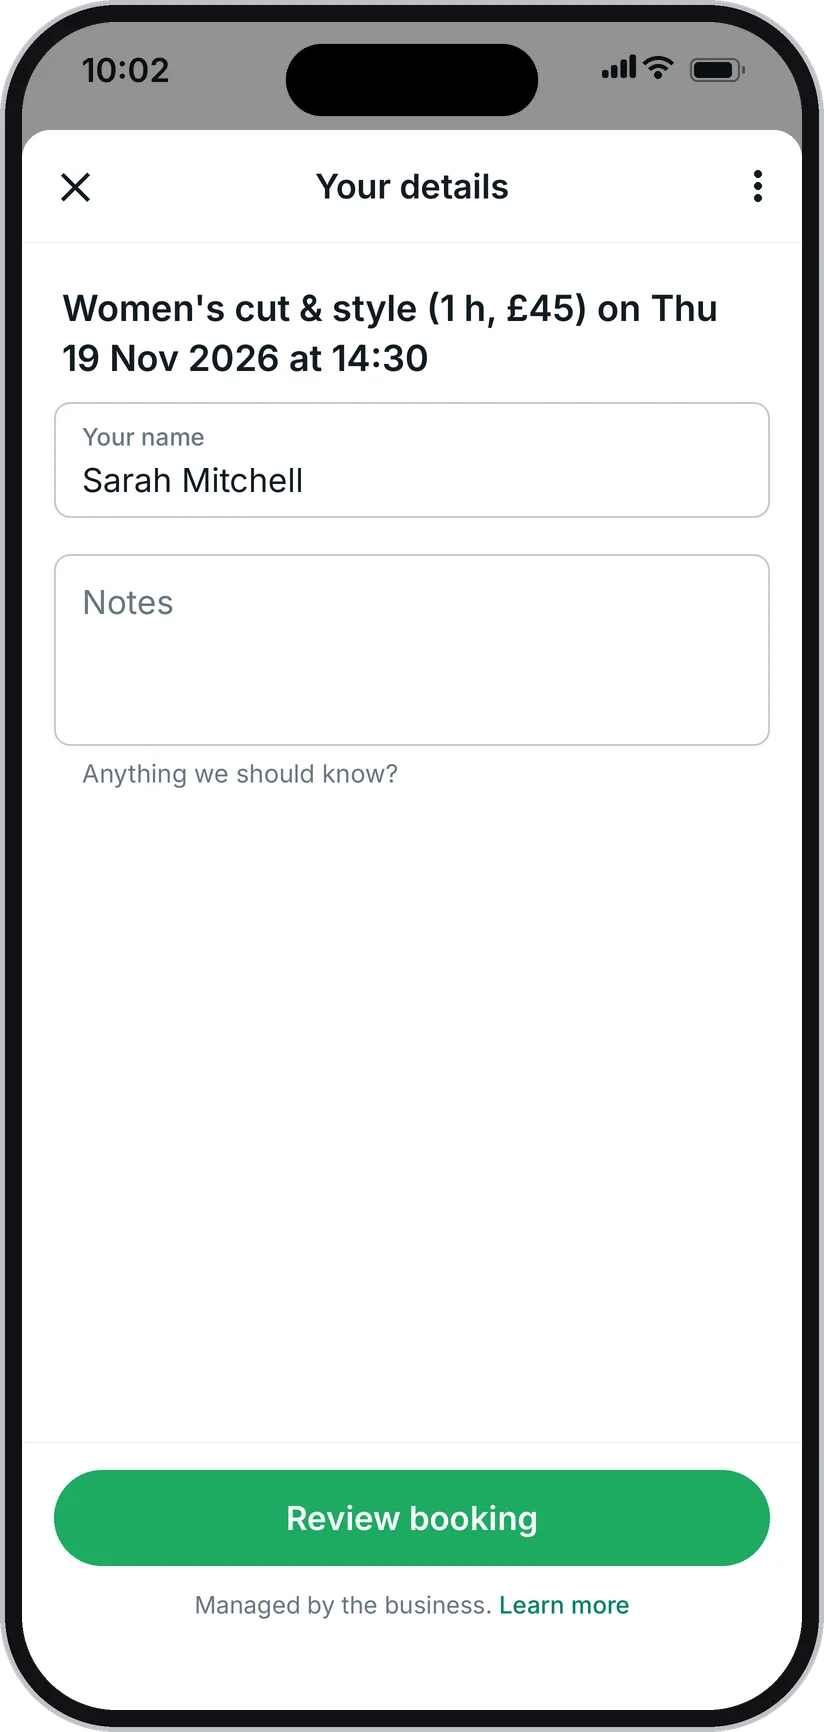
Step 5 of 12
Their name is already filled in from their WhatsApp profile, and the booking is made for their WhatsApp number. Usually they just tap Review booking.
You set
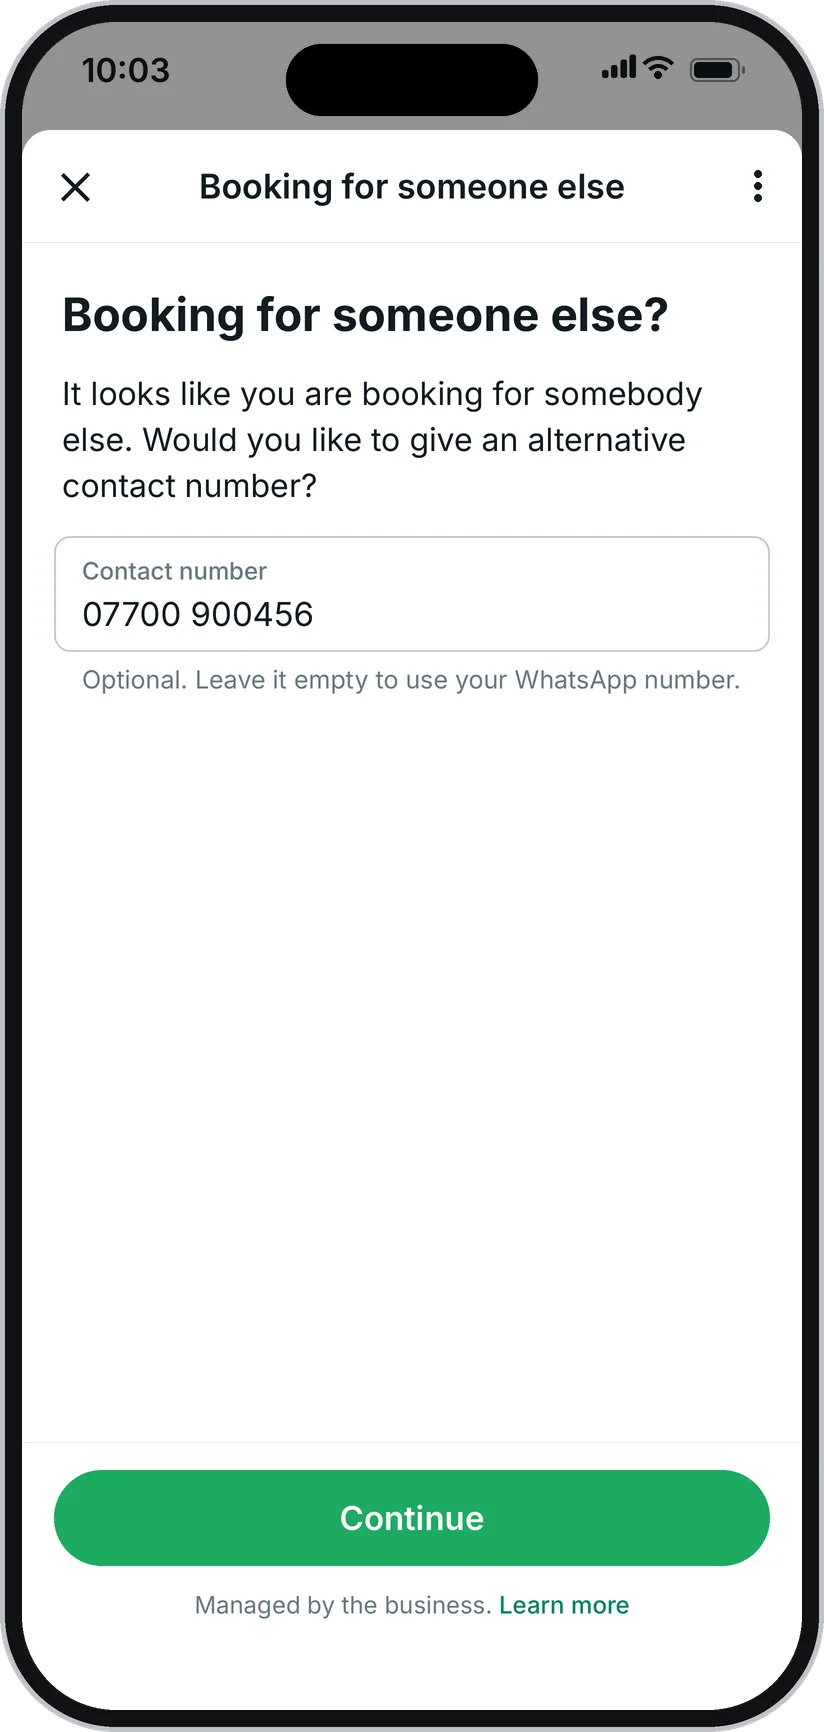
Step 6 of 12
Only if they change the name: the form asks whether they would like to give another contact number. It is optional, and it goes with the booking to your calendar and your emails.
You set
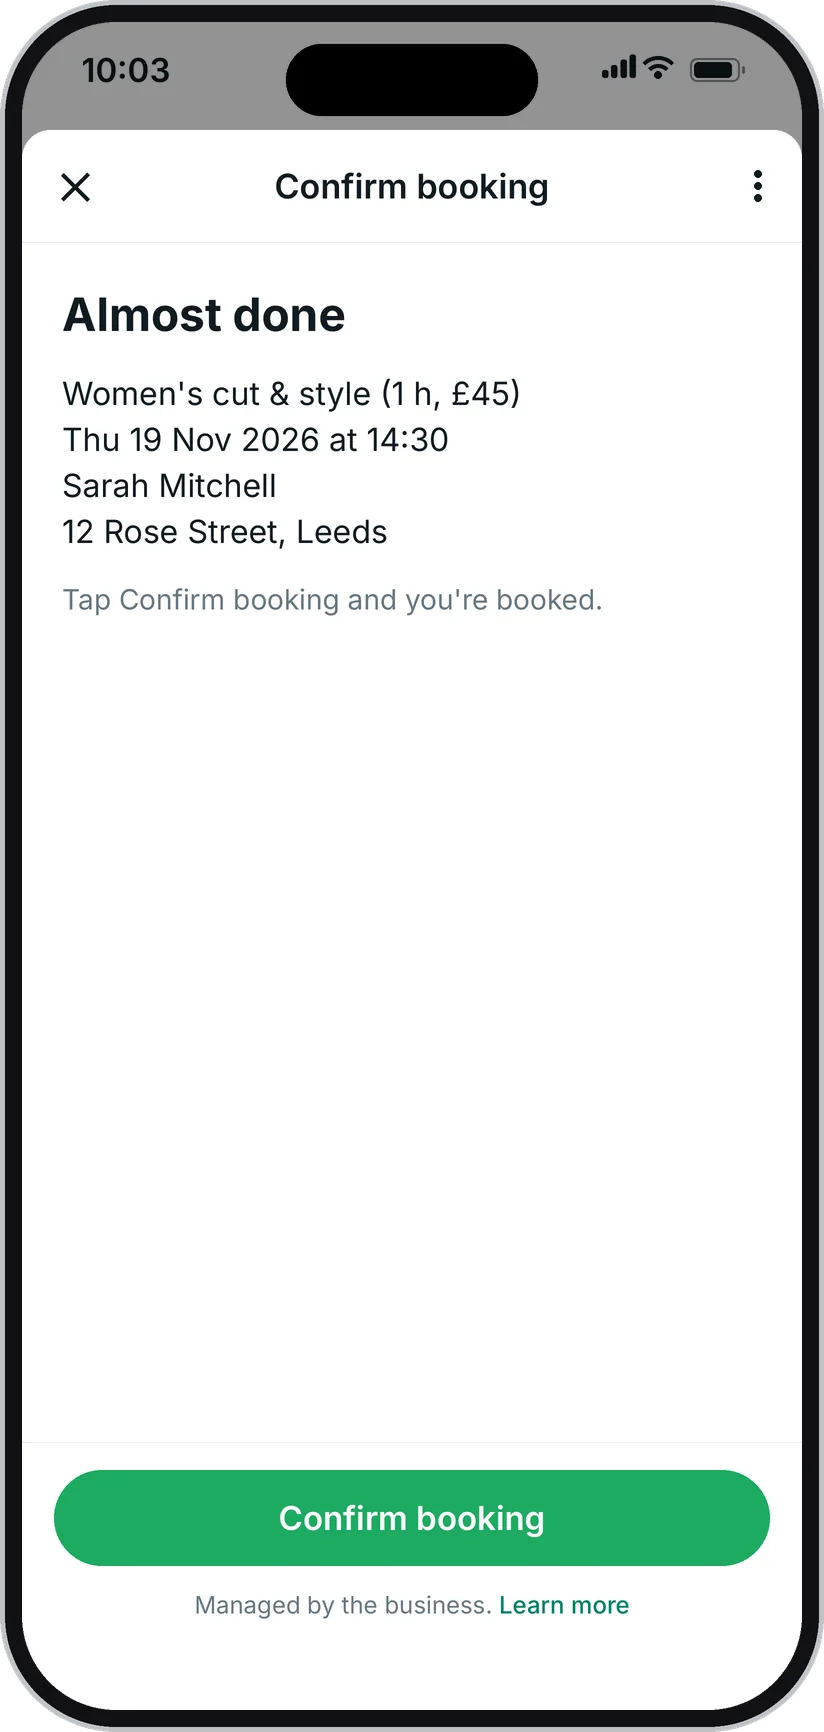
Step 7 of 12
A short summary: service, day and time, name and address. One tap on Confirm booking and the time is theirs.
You set
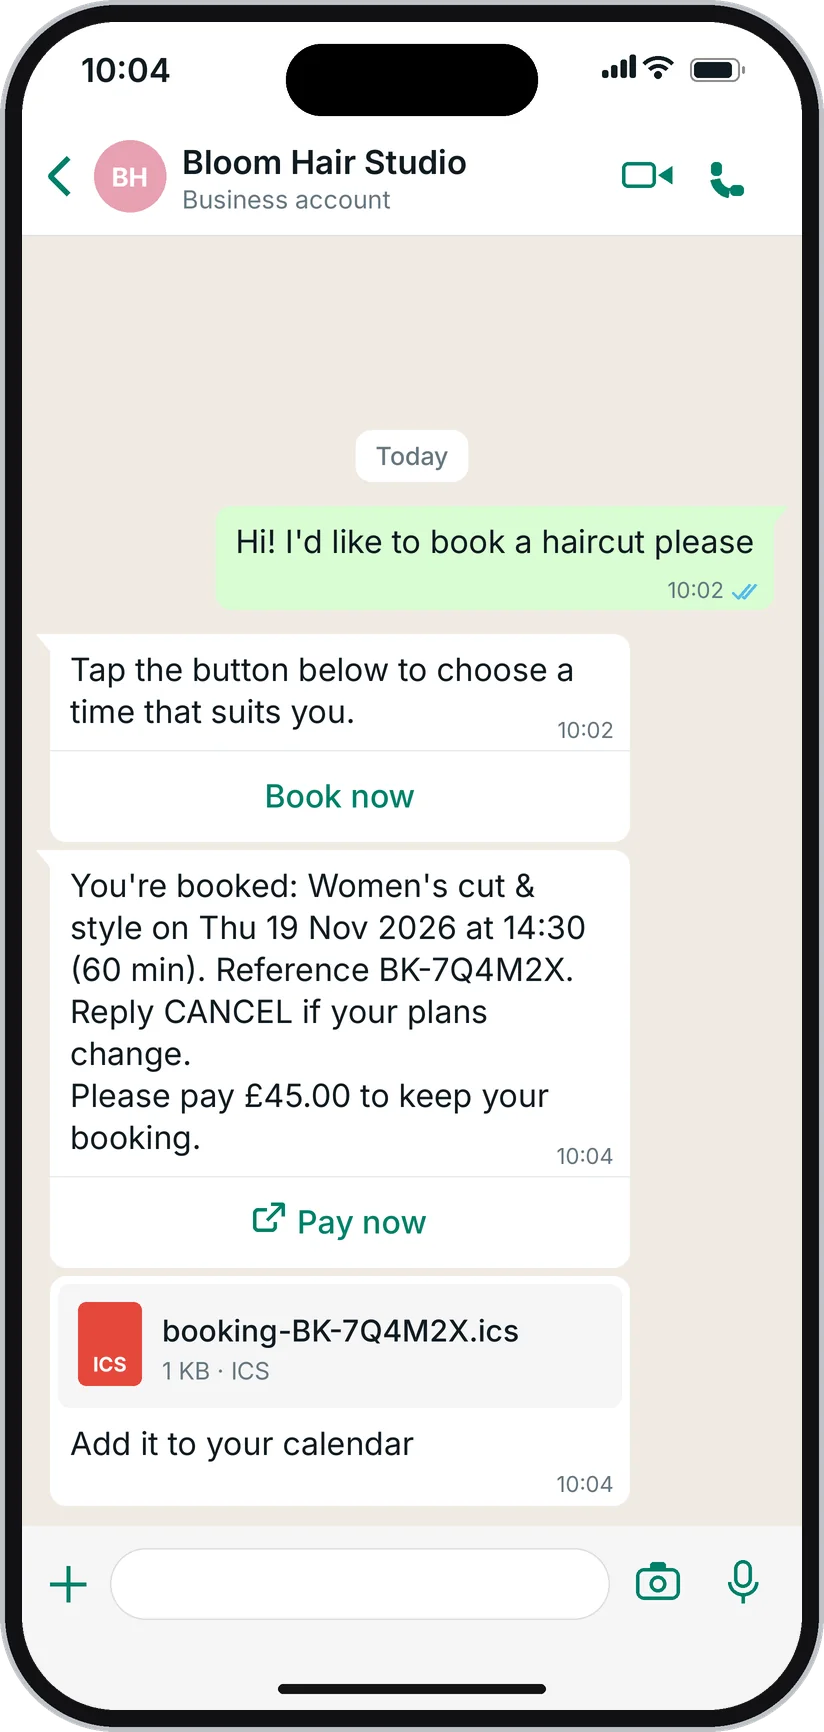
Step 8 of 12
The confirmation arrives in the chat at once, with a booking reference and a Pay now button. A calendar file comes with it: one tap adds the appointment to their phone.
You set
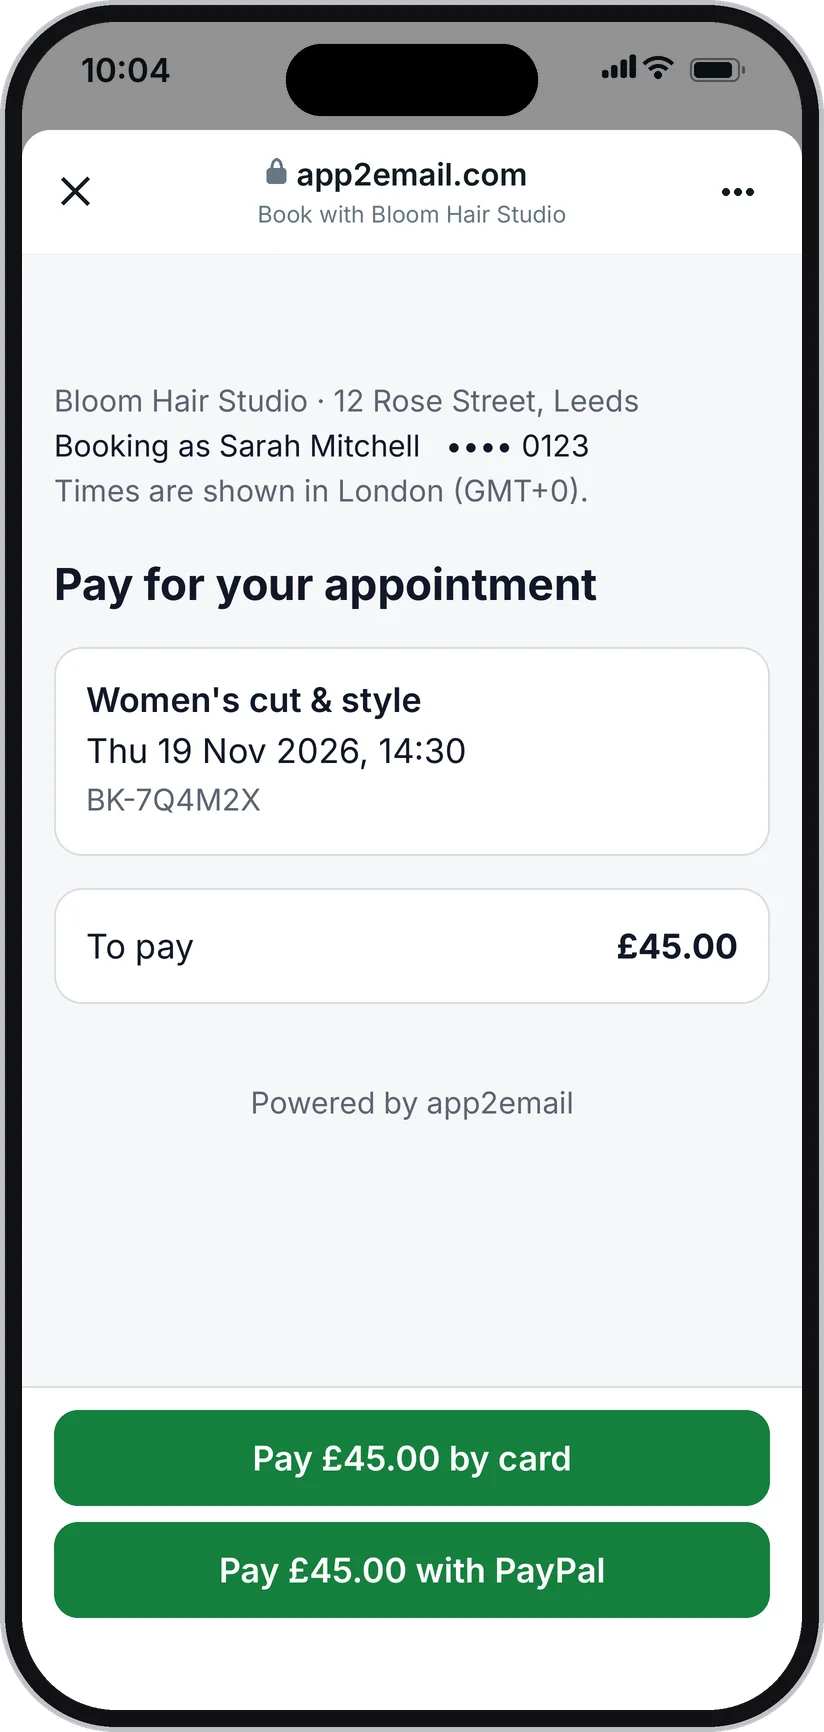
Step 9 of 12
Pay now opens their own payment page. They pay by card or with PayPal, on Stripe's or PayPal's secure page, and the money goes straight into your own account.
You set
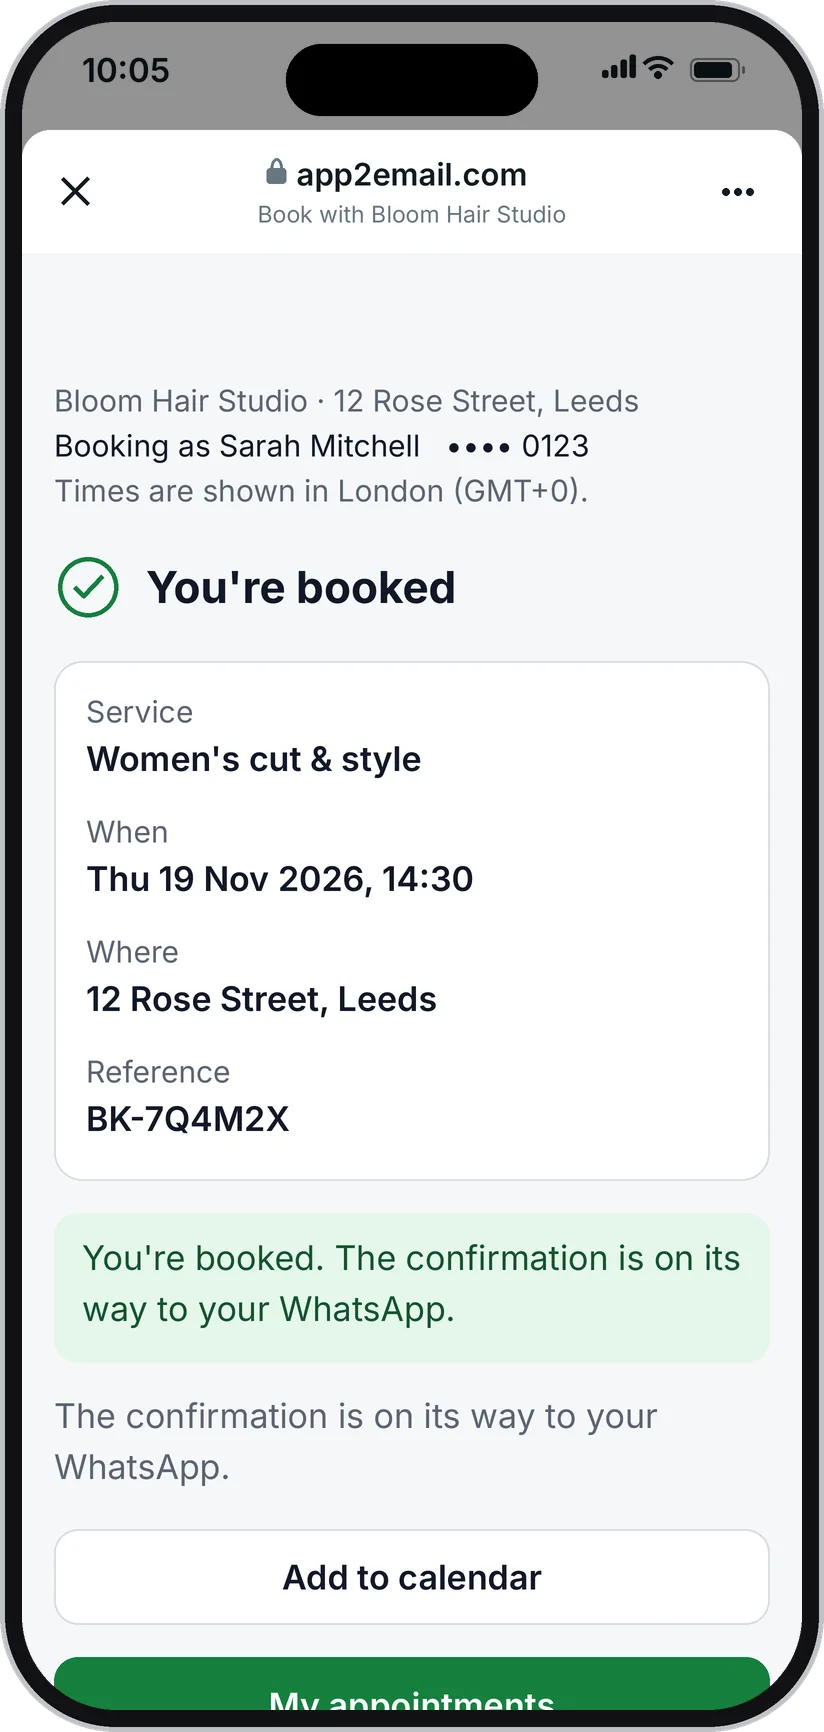
Step 10 of 12
Back from the payment, the page confirms the booking. The payment is checked with Stripe or PayPal directly, never just taken on trust.
You set
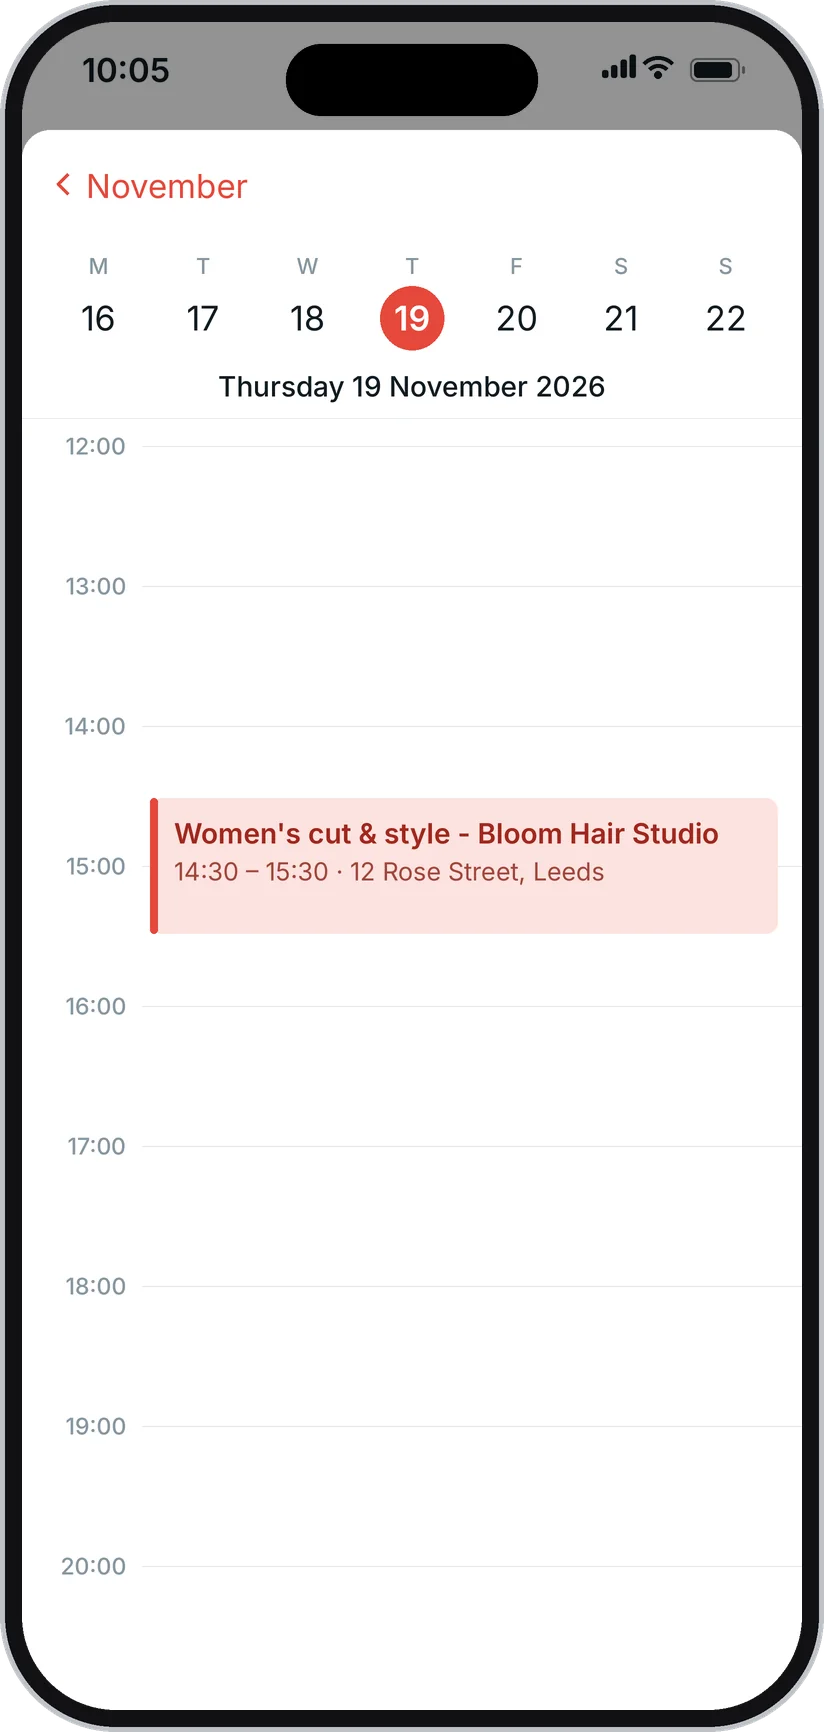
Step 11 of 12
The calendar file puts the appointment in the customer's own calendar app, with the time, the place and the booking reference.
You set
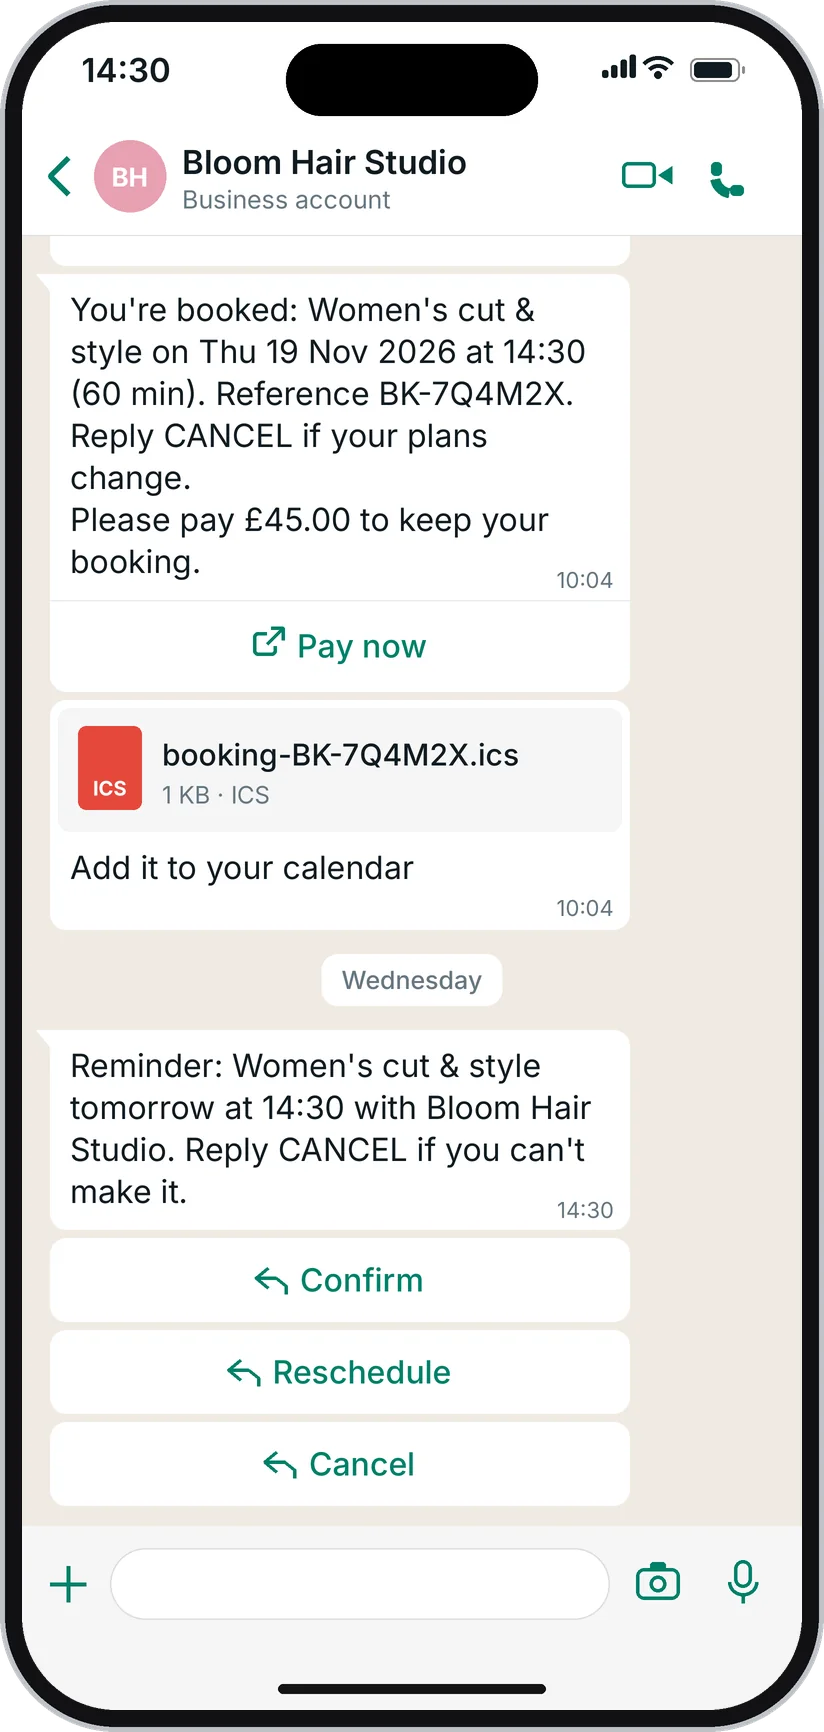
Step 12 of 12
Before the appointment a reminder arrives on WhatsApp with Confirm, Reschedule and Cancel buttons. No phone calls needed.
You set
The pictures show an example business. WhatsApp draws the form in its own style, so it looks a little different on each phone.
Each booking is written to your calendar the moment it is made: Google Calendar, Microsoft 365 / Outlook.com, Apple iCloud (CalDAV), Cal.com, Calendly, Acuity, Square, Microsoft Bookings, SimplyBook.me, Setmore, Zoho Bookings, or the app2email calendar. You choose the event title and description.
An email for each new booking, each change and each payment, to the address you choose. Extra rules are up to you: a message to the customer, to you or to a team member when a booking is made, moved, cancelled, paid, before it starts or after it ends.
Payments go to your own Stripe or PayPal account, in your currency. Paid, part-paid and refunded bookings are marked in your dashboard.
Team members can use the calendar app on their phone with their own login, without access to the rest of your account: see the day, add bookings, message customers.
Your customers see your business, your words and your colours. Try it on the example page.
Shown on every screen, in the messages and on the booking page.
Every message and every screen of the form: the reply, the buttons, the confirmation, the reminders.
Your logo, your brand colour for the buttons and highlights, and your background colour on the booking page and the payment page.
A headline and a short welcome text at the top of the booking page.
www.app2email.com/book/your-name, ready to share on your website, Instagram, Google profile or business card.
Put the booking page inside your website, in your colours.
A cancellation policy, how late customers may still cancel or move, and whether they can manage their own appointments online.
Remove the small "Powered by app2email" line.
Some customers prefer a web page to a form in a chat. Share your booking page anywhere: they pick a service and a time in their browser and pay online, and they are booked. When there is nothing to pay, the time is held for a few minutes while they confirm with one ready-made WhatsApp message. Customers who already wrote to you get a personal link, where they can also see, move or cancel their appointments.
Step 1 of 5
Bloom Hair Studio · 12 Rose Street, Leeds
Pick a service and a time. You pay online to confirm.
Powered by app2email
Click through the page as a customer would, and change it here. These are the same settings you get in your dashboard under Book-and-Pay, Online booking. It is an example: nothing is booked, paid or uploaded.
The same colours and logo are used on the payment page and the "You're booked" page.
Connect your WhatsApp number, add your services and opening hours, connect your calendar and your Stripe or PayPal account, and publish the booking form. In your dashboard it is under Integrations, Book-and-Pay.